Monday, December 14, 2020

Stuff It Squash

There are many recipes out there for making a stuffed acorn squash, but as I surveyed them they all had some fatal flaw. Either they were too fussy about the squash, the stuffing lacked sophistication, or in one awful case, the squash and stuffing were prepared separately! That's false advertising!

I decided to invent my own recipe, and luckily the farm I subscribe to had a bumper crop of acorn squash this year, so I had ample opportunities to refine it.

Serves 2

Stuff It Squash

  • 1 acorn squash
  • 1/2 cup white rice
  • 5/8 cup (5 ounces) beef stock
  • 1/2 teaspoon salt
  • Fresh ground pepper to taste
  • 1 celery stalk
  • 1 medium carrot
  • 1/2 honeycrisp apple
  • 4 slices of bacon
  • 1 shallot
  • Vegetable or olive oil
Start by cooking the rice in the beef stock. Always start by rinsing the rice until the water runs fairly clean. I use a sieve and the sprayer setting on my kitchen faucet. For cooking, I use my Japanese rice cooker, so just toss it in and hit one button. Use whatever method of rice cooking works for you. The proportions are 1 part rice to 1.25 part cooking liquid.

Don't skip rinsing the rice.

Cook your bacon strips using your preferred method. I use the air fry setting on my range at 425 for 13 minutes. Chop finely and set aside.

Chop your vegetables and apple finely and set aside.

In a sauté pan, add about a tablespoon of oil and add your shallot. Cook until it begins to brown.

Preheat your oven to 425F.

When you rice is done, combine it with your sautéed shallot, bacon, vegetables, apple, salt, and pepper and mix.

Fill the squash with the stuffing mixture. Pack the cavity firmly and mound the dressing a little above the edge of the squash.

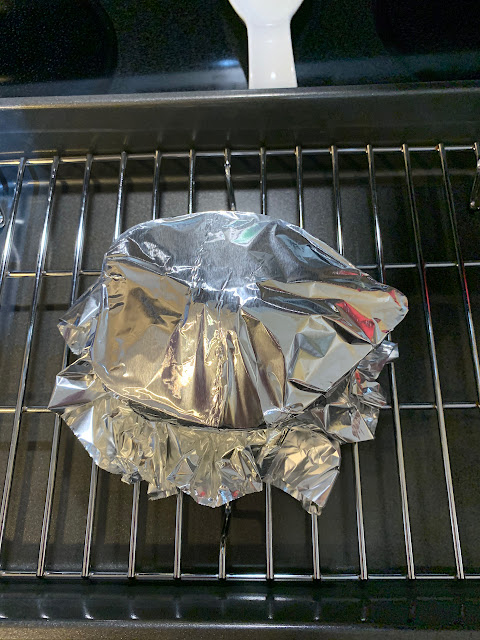
Cover tightly with tinfoil and bake for approximately 1 hour. Squash are done when a fork easily sinks into the flesh.

Remove from the oven and let rest covered with the tinfoil for about 15 minutes.

broccoli, celery, carrot, mushrooms, shallot, and rice on a cutting board

Finely chopped vegetable ingredients on cutting board

squash stuffed with stuffing on a cutting board
I added the last of the butter before cooking this time. I should have waited.

Squash covered with tinfoil on a roasting rack

Cooked stuffed squash on a roasting rack


Cranberry Apple Sauce

There is one thing and I and my husband will never see eye to eye on; cranberries. I absolutely love things that are tart, and he is more of a sweet guy. When we have had holiday meals together, I always have the cranberry sauce on the side for myself while he eschews it.

Since we have to have our Winter Solstice Banquet online this year due to the pandemic, I will be using this cranberry apple sauce as a glaze on a pork tenderloin roast. It is also great on turkey sandwiches, and as a topping for vanilla iced cream.

Cranberry Apple Sauce

  • 2 Honeycrisp apples
  • 12 ounces fresh cranberries
  • 1 tablespoon fresh orange juice
  • 1 teaspoon fresh lemon juice
  • 1/2 cup sugar
  • 1/2 cup water
Wash the cranberries being careful to discard any that have become mushy or whose skin has broken.

Wash, core and slice your apples into chunks

Add sugar, water, and fruit to a saucepan.

Cook over medium low heat until all cranberries have burst and apple chunks are soft.

Use a potato masher to pulverize the fruit in the sauce pan.

Place a sieve over a mixing bowl and put the cooked fruit into it. Allow the fruit to seep through as it cools for approximately 30 minutes. Use a wooden spoon to scrape the drained mixture up away from the mesh so that undrained portions can make it through. Continue until what remains in the sieve is mostly skins, stems, and other things you don't want in a sauce.

If you want a thicker sauce, return the strained fruit to a clean saucepan and reduce over low heat until it reaches your desired thickness.

Once the strained fruit mixture is cool, stir in the citrus juices. Never add the citrus juices while the mixture is too hot, as it will destroy the vitamin C in the juice and leave a bitter taste.


Sunday, December 13, 2020

Solstice Salad

This recipe started out many years ago as an upscale version of a Waldorf Salad, but I have made enough modifications over the years of the Winter Solstice Banquet, that it deserves its own name. I know that many of you might have been served something that was called a Waldorf Salad, but believe me, if you hated it, it was not this salad.

Give this wintry creation a try!

Serves 2 or 3

Solstice Salad

  • 1 Honeycrisp apple
  • Juice of 1/4 lemon
  • 1 1/2 stalks of celery
  • 3 spears of red pepper
  • 1 scallion
  • 3 heaping tablespoons raw shelled pistachios 

For the dressing

  • 1/4 cup sour cream
  • 1 teaspoon mustard
  • 1 1/2 teaspoon honey
  • Salt and pepper to taste

Put it together

Preheat your oven to 200F and spread the pistachios on a baking sheet. Lightly toast for about 20 minutes. Chop finely in a food processor or mill and set aside

Peel, core and quarter the apple. Cut into pieces about a 1/4 inch. Toss with the lemon juice.

Cut the celery and red pepper into pieces smaller than the apple pieces and add to the mix.

Chop the scallion into really small pieces and add them in as well.

Whisk together the sour cream, mustard and honey. Add salt and ground pepper to taste.

Toss the salad and dressing together. Plate using a slotted spoon, allowing excess dressing to fall away.

Dust the salad generously with the toasted ground pistachios.

Chill the plated salads in the refrigerator before serving.

apple, celery, red pepper, scallion, and knife on cutting board
I know there are only two red pepper spears here. I had to adjust!

Pistachios ready for toasting

Dressing whisked

Chopped and tossed

Such a great aroma!

Let the Winter Solstice Banquet begin!